
Qetaab/Help/Customers & vendors
Customers & vendors
Add and manage customers and vendors
Every invoice, bill and payment is tagged with a name, so aging reports and 1099 tracking work.
- Who this is for
- Owner, admin or bookkeeper. Viewers can read the list.
- Before you start
- The name, and ideally the email and payment terms, of each customer or vendor.
- Availability
- Available in the hosted app and the local build.
Steps
- Open Customers & Vendors (under Money in) and choose + New customer or vendor in the toolbar.
- Enter the Name and choose the Relationship: Customer, Vendor, or Customer & vendor for someone on both sides. Add Email, Phone, Entity type, Payment terms (days), a default Sales tax rate and Billing currency if they are invoiced in another currency.
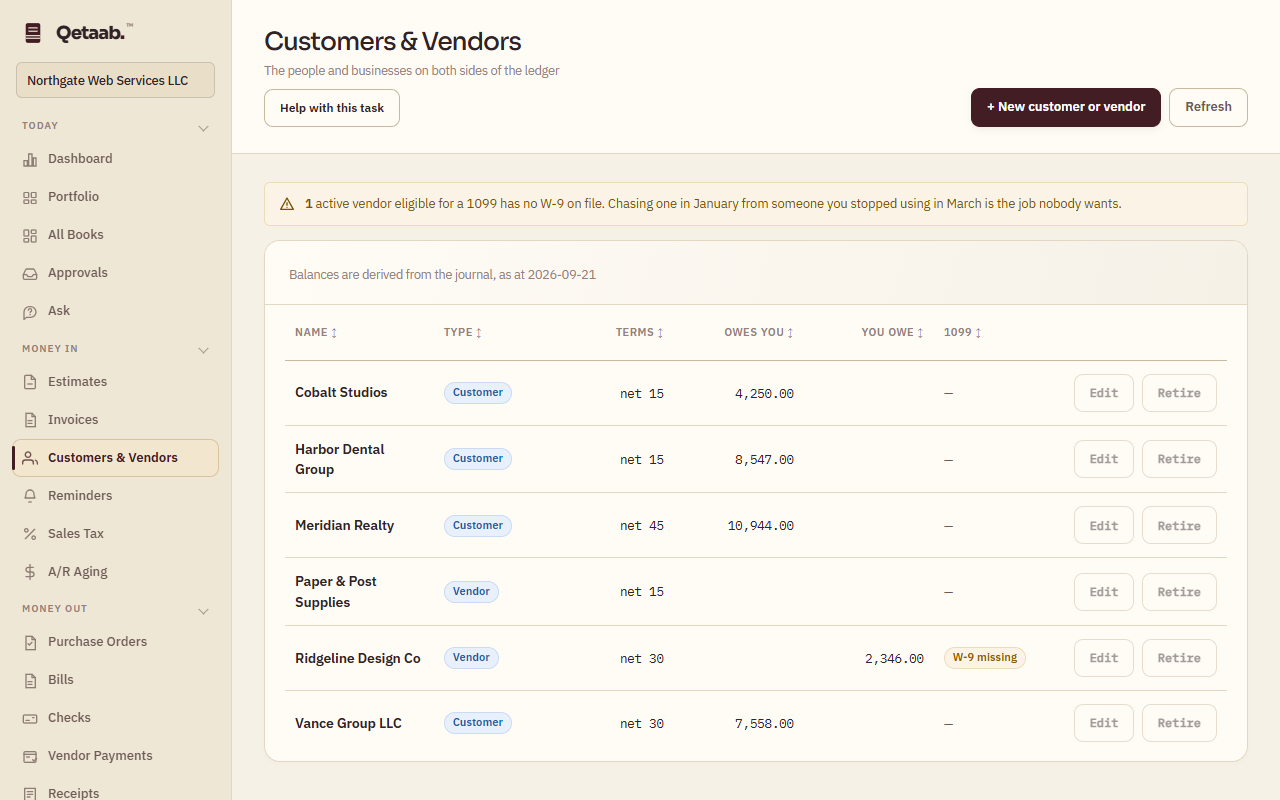
- For a vendor who may need a 1099, tick W-9 on file once you hold it. The list shows W-9 missing until then, and a banner counts eligible vendors without one.
- The list shows Owes you and You owe from the aging reports, so this screen and A/R Aging or A/P Aging can never disagree.
- Choose Edit to change details, and Retire to hide a name from new documents without losing its history. Restore brings it back.
What you should see
The name appears in the list and in the Customer or Vendor field of new invoices and bills, and can be typed there directly — a new name typed on an invoice offers to create the record.
If it goes wrong
A name cannot be deleted once it has activity; use Retire. If a name appears twice, retire the duplicate and use the original on new documents.
What it looks like
Related guides
Steps checked in the app on 2026-09-21. This guide describes how the software works; it is not accounting, tax or legal advice. Need a hand? Email support@qetaab.com.
All guides →